EnvisioKnit User's Manual
Download a print-friendly version (PDF).
Table of Contents
- Getting Started
- The Chart Editor
- The Pattern Editor
- The Yarn Studio
- Stitches
- Printing and Exporting
- Settings
- Tools
- Hotkeys and Shortcut Keys
- Other Features
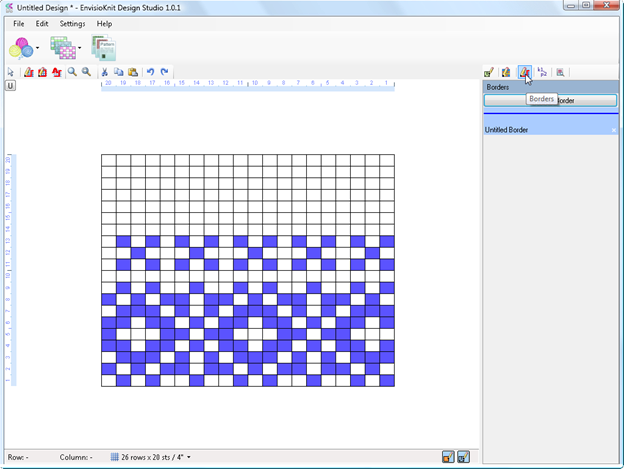
Border Mode

Border Mode
The border editing mode lets you draw borders on your chart. The available borders are shown in the palette on the right.

Editing Border Properties
Click Add New Border to create additional borders, or double-click on a border in the palette to edit it.
The Name you give your border will be shown in the legend. You can customize the border Color, which is used for both lines and text. The Line Width, or thickness, can also be adjusted, relative to the size of the chart grid.
Denoting the Border in the Written Instructions

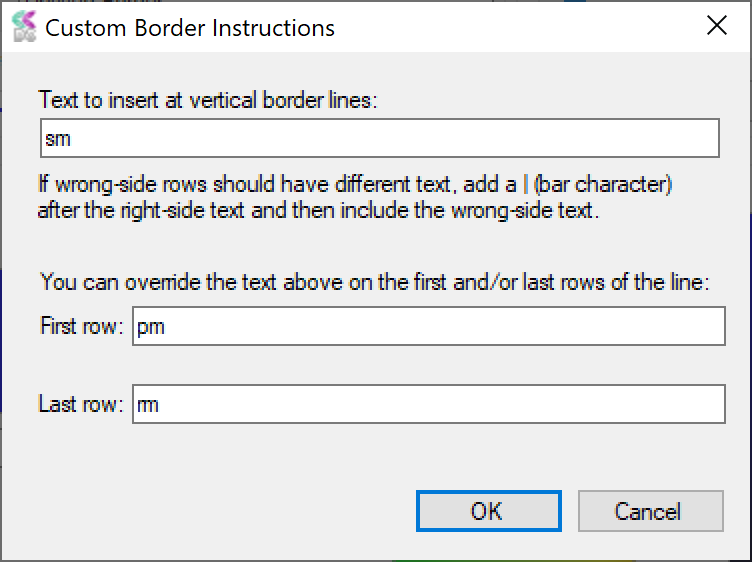
Setting Custom Border Instructions
The Written Instructions option allows you to denote the border in the written stitch instructions. The Written Instructions setting options are:
- None - This is the default setting, so no written instructions are initially associated with the border.
- Place Marker: pm - Inserts the text “pm” into your written stitch instructions, at the location of vertical border lines.
- Custom - Inserts any text that you specify into the written instructions, at the
vertical border lines.
The First row and Last row settings can be optionally used to override the custom text on just those rows. For example, you can set the text to "sm" for slip marker, but have the first row text be "pm" for place marker and the last row as "rm" for remove marker. These settings can be left blank if you do not want to override the custom text on these rows.
You can specify separate text for wrong-side rows by including it after a separator character: | (the bar or pipe character). For example: "Work with second ball|Work with first ball"
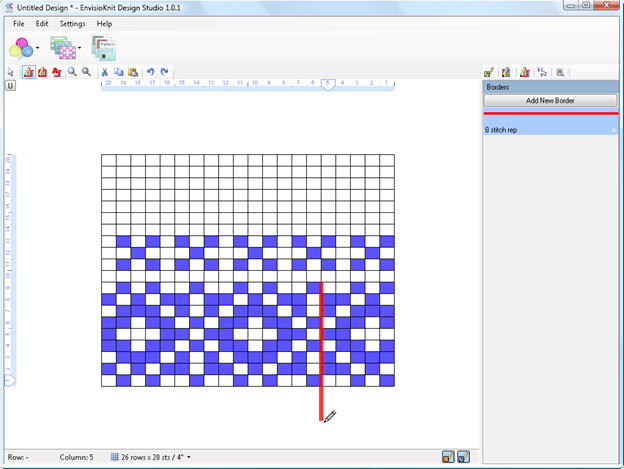
Border Tools

Border Toolbar
Once you have selected a border, click one of the border drawing tools to draw it on your chart.
Draw Border Line

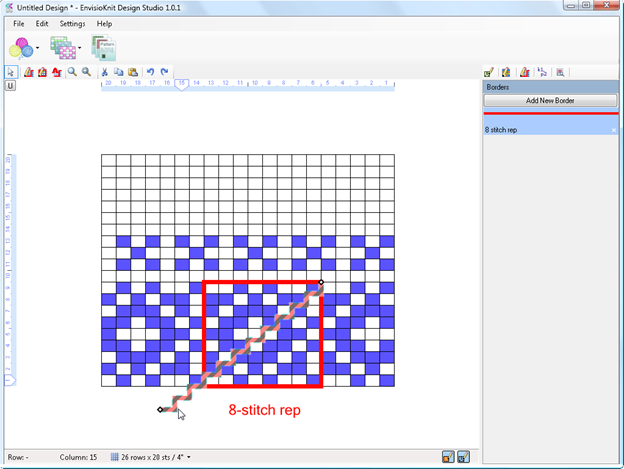
Drawing a Border Line
Draws the selected border on your chart. Left-click where you want the border line to start, and continue left-clicking everywhere you want an end-point. Right-click or press Escape to finish the border line.
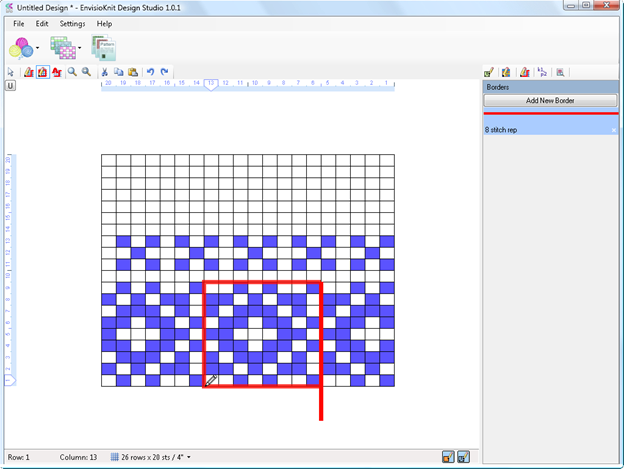
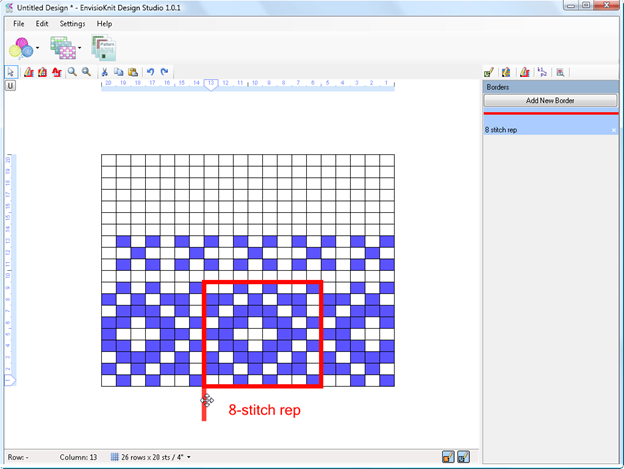
Draw Rectangular Border

Drawing a Rectangular Border
Draws a rectangular border on your chart. Left-click where you want one corner of the rectangle, and click again where you want the opposite corner. Right-click or press Escape to cancel.
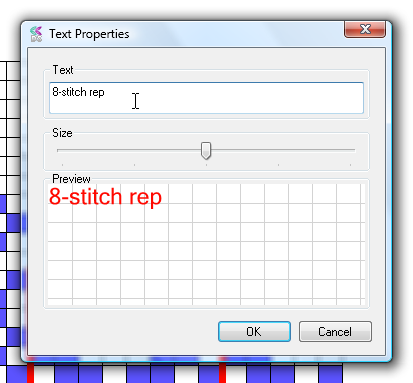
Draw Border Text

Border Text Settings
Draws text associated with your selected border. Left-click on the chart and you will get a pop up window to set the text content and size. When finished, left-click on the chart to place the text. To cancel the text placement, right-click or press Escape.
Border Select

You can select and edit your existing border lines and text with the border select tool.
To edit border text, use the select tool to click on the text. The text will appear highlighted to show that it is selected. To move the text, click on it and then drag to the desired location. To change the text, double click on it and the border text editing window will appear where you can change the content and size of the text.
To edit a border line, left-click anywhere on the line. The line will be highlighted and the endpoints will be shown as diamonds.

Click an endpoint to drag it to a different location...

Or move the whole border line as one by clicking anywhere else on the border and drag it to the new location.
Draw Border Around Selection
Borders can be drawn without using the border tools. Stitch Drawing Mode, you can select an area of the chart, right-click on it and choose Draw Border Around Selection from the menu. A window will appear where you can choose the border to use. Click OK and a border line that outlines the selection will be added to your chart. The Border Around Selection tool works for non-rectangular and non-connected selections as well. This is a quick and simple alternative to drawing border outlines manually.