EnvisioKnit User's Manual
Download a print-friendly version (PDF).
Table of Contents
- Getting Started
- The Chart Editor
- The Pattern Editor
- The Yarn Studio
- Stitches
- Printing and Exporting
- Settings
- Tools
- Hotkeys and Shortcut Keys
- Other Features
Preview Mode
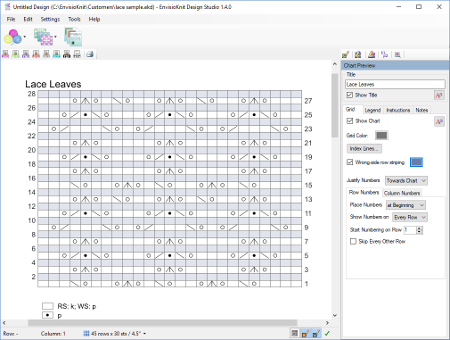
Chart Preview
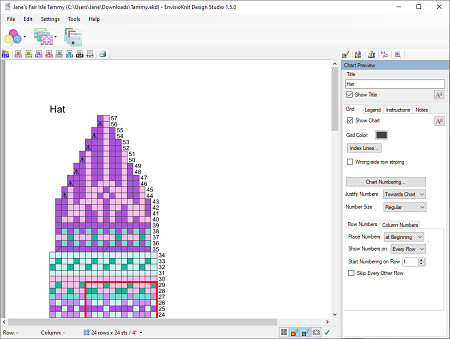
The Chart Preview Mode presents the chart as it will appear when you export it. There are several options for customizing the look of the chart. Please note that, with the exception of the font settings (which apply to the entire pattern), these settings only affect your current chart.
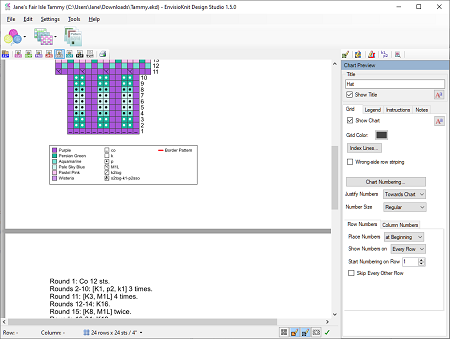
Chart Preview - Scrolling Down
The main window on the left side of the screen shows a preview of your chart, and the title, legend and instructions associated, formatted for the printed page. EnvisioKnit automatically formats your chart to fit on the first page, and the written instructions follow, spanning subsequent pages, if necessary. When you export your chart to a paged format (such as PDF, Word, or Open Office), the page layout should match very closely, if not exactly, what you see here in the preview.
Chart Preview Options
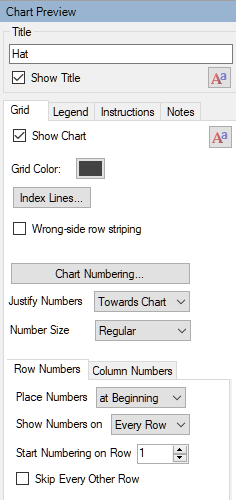
Chart Preview Options
The panel on the right side of the screen contains several options that you can apply to customize the appearance of your chart. The Title setting for the chart is at the top and underneath it are 4 tabs containing additional settings: Grid, Legend, Instructions and Notes. The chart preview will update automatically as you modify the settings, so you can instantly see the result of your choices.
Title Options
In the title settings, you can set the title of your chart. Just type it in under Title. If you don't want the title to appear on your chart, disable the Show Title checkbox. On the right side of the Title settings is a font button, which will open the font settings for the Chart Titles in your pattern.
Grid Options
There are several options on the Grid tab. The first few items pertain to the grid itself. You can change the color of the grid by clicking the colored button next to Grid Color:. Clicking the font settings button will open the font settings for the Chart Numbers.
Index Lines
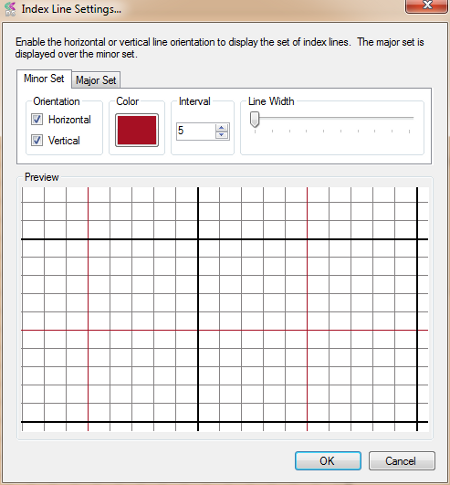
Chart Preview Options
Clicking the Index Lines... button will open the Index Line Settings window. This tool allows you to configure index lines for your chart grid. Index lines are heavy grid lines spaced at intervals to help knitters track their position in the chart. Index lines are only shown in the chart preview and the exported chart output, and will not be visible while you are editing the chart.
You can configure 2 sets of index lines: a minor set and a major set. This way you can indicate a small interval and a larger interval, say 5 and 10. To enable a set of lines, check one or both of the Horizontal or Vertical checkboxes under Orientation. You can configure the color, interval and line width for each set. Please not that the major set of lines is displayed over the minor set, so the major set will look best with a line width as thick or thicker than the minor set.
Row Striping

Wrong-side Row Striping
Row Striping Enabled
You can check the Wrong-side row striping option to enable a shaded overlay on your wrong-side rows. Once checked, you can configure the color and opacity of the overlay. The row striping is a knitting chart convention that can help make it more apparent to the knitter that these rows are to be worked from the wrong-side.
The rest of the settings in the Grid group are related to the numbering of the chart. From the drop-down next to Justify Numbers, you can select whether to justify the number text to the right, to the left, or towards the chart (numbers on the right of the chart will be left-justified, and numbers on the left of the chart will be right-justified).
Numbering Options
The numbering options in the chart preview control the appearance of the row and column numbers around the chart grid. To change the chart numbering scheme (i.e. the starting row and column, etc.) select Set Chart Numbering in the Grid Settings.
Numbering Options
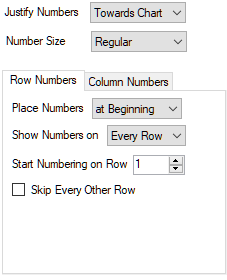
Number Justification
Chart numbers can be justified towards the chart, always to the left, or always to the right.
Number Size
The size of the numbers can be set to large, regular, small or extra small. The number size is relative to the row height.
Row Numbering
Under the Row Numbers tab, you can choose to place your chart's row numbers at the beginning of the row, on both sides of the row, always on the right, or on the left of the row. When numbers are placed at the beginning of the row, the position is determined by whether the row is a right-side or a wrong-side row. Right-side rows begin on the right side of the chart, so the row number is placed on the right. Wrong-side rows begin on the left side of the chart, so the row number is place on the left.
From the drop down next to Show Numbers on you can select Every Row, Alternate Rows, or No Rows. Selecting every row will show row numbers on every row in the chart. Selecting Alternate Rows will show numbers on alternate rows, and if you choose this setting, an additional option will appear where you can set how many rows you want to alternate by.
You can set the chart row that you want to start numbering on by adjusting the number next to "Start numbering on row".
Enabling the Skip Every Other Row checkbox will number the chart skipping every other row number (i.e. 1, 3, 5, ...). In this case, the chart instructions will be generated as though those intermediate rows are not charted, and will include a note that they are to be worked in the established pattern. This option is particularly useful for lace or aran designs where the stitch patterning is on alternate rows and the rows between are knit plain.
Column Numbering
Column Numbering Options
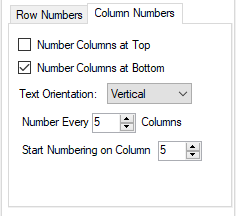
Switching to the Column Numbers tab, you will find checkboxes for enabling column numbers on the top and bottom of the chart.
The Text Orientation option allows you to specify whether the column numbers should be oriented vertically or horizontally. If the column numbers are oriented horizontally, EnvisioKnit may scale them down, if necessary, to fit the width of a chart cell (so that they do not overlap each other).
Legend Options
Legend Options
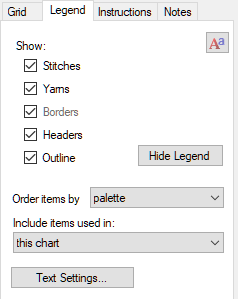
The legend options includes a set of checkboxes with which you can disable or enable parts of the legend. You can choose to include or exclude the list of stitches, yarns and/or borders used in the chart. You can also choose whether those lists should have headers (i.e. Stitches, Yarns, and Borders), and whether the legend should be outlined.
Clicking the Font button on the right will open the font settings for the chart legends in your pattern. You can set separate font styles for the legend contents and the legend headers.
The Legend Order can be set to order items by their:
- order in the palette
- appearance in the chart (left-to-right only - this is a legacy option, use worked order instead)
- name, alphabetically
- order in which they are worked in the chart
The Legend can include items used in just the current Chart or all items used in the entire Pattern.
The Text Settings button will open the Text Settings for your pattern. Here you can customize the fixed text used for the legend headers and the stitch legend items.
Instruction Options
Instruction Options
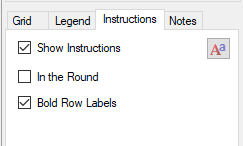
The instruction options configure the appearance of the written stitch instructions in your chart. If you do not want to show the written stitch pattern instructions with your chart, you can disable the Show Instructions option. Checking the In the Round option will interpret your chart for circular knitting when generating the instructions for it.
The Bold Row Labels setting determines whether the row labels (i.e. "Row 1:") should use a bold font. Using a bold font can help to visually separate the row labels from the instruction text.
Chart Notes
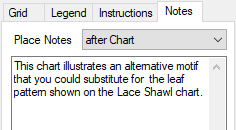
Chart Notes
Designers can include chart notes to appear in the pattern along with an individual chart. Notes should be text that is supplementary to the charts written instructions and too specific to the chart to belong in the Pattern summary. The placement of the chart notes is configurable with the Place Notes setting. The placement options are: before the chart title, after the chart title, before the written instructions or after the written instructions.
Chart Export

Chart Preview Toolbar
You can directly print or export the chart in the Chart Preview by clicking the print or export buttons in the toolbar (above the main window). Printing or exporting from the chart preview outputs the current chart only. To print or export the full pattern, you will need to go to the Pattern Editor.
The available export formats are ZIP, SVG, BMP, PNG, JPG, Microsoft Word (DOCX), Open Office (ODT), PDF and TXT.
Please see the Printing and Exporting documentation for more information about the available options.